Tab Theme
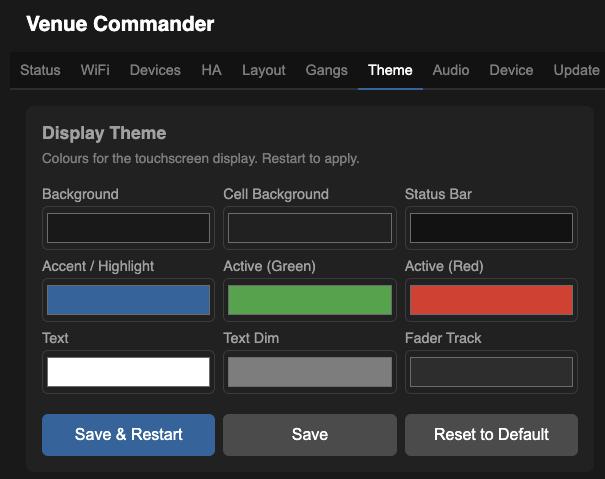
The Theme tab lets you customise the display colours used on the touchscreen. All values are hex colour codes with colour pickers.
| Colour | What it controls |
|---|---|
| Background | Main screen background |
| Cell Background | Widget cell fill colour |
| Status Bar | Top status bar background |
| Accent / Highlight | Active selections and focus indicators |
| Active (Green) | Toggle/toggle button on/off colour (green option) |
| Active (Red) | Toggle/toggle button on/off colour (red option) |
| Text | Primary text colour |
| Text Dim | Secondary/muted text |
| Fader Track | Fader slider track colour |
- Save & Restart — saves and reboots to apply the new theme.
- Save — saves without restarting (theme applies on next reboot).
- Reset to Default — restores the factory default colour scheme.
Tab Device
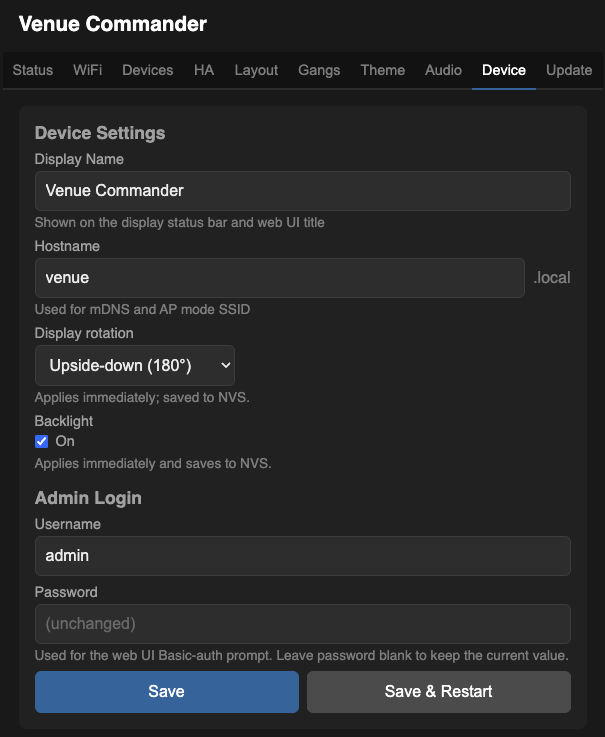
Device Settings
| Display Name | The title shown on the touchscreen status bar and in the web UI header. Also used as the Bluetooth name the optional audio board advertises — so the “speaker” your phone sees matches what you call this venue. |
| Hostname | The short name used to reach the device on your local network (e.g. venue → http://venue.local). Also the WiFi network name shown in setup mode if the device can't reach your WiFi. |
| Web Password | Password for the web UI. Username is always admin. Change this from the default venue123 early — once the device is on your network it's reachable to anyone on that network. |
PIN Keypad Auto-close Timeout
How long the page-PIN keypad stays open before auto-closing without a successful PIN.
| Keypad timeout (s) | Total time from open. Default 60. Set to 0 to disable auto-close. Not idle-based — partial digit entry does not extend the window. |
Logo
Upload a PNG image (max 64 KB) to use as the bouncing screensaver logo. If no logo is uploaded, the device name is displayed as text instead.
Maintenance
- Restart Device — reboots the device.
- Factory Reset — erases all saved configuration (WiFi, endpoints, layout, theme, PINs, audio-board settings) and restores factory defaults.
Screensaver
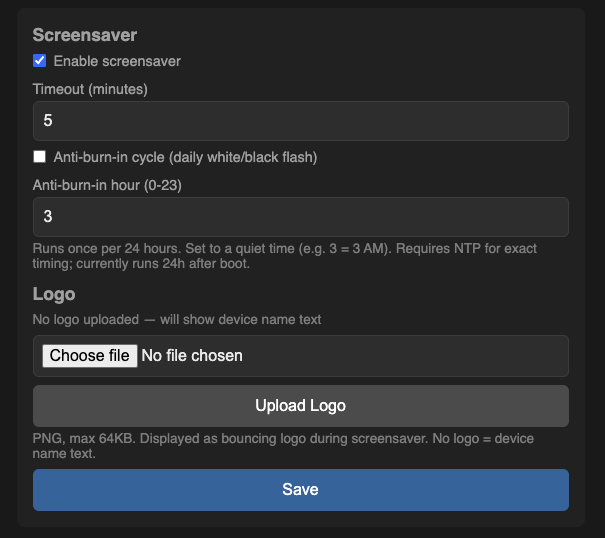
Screensaver Settings
| Enable screensaver | Activates the bouncing-logo screensaver after a period of inactivity. |
| Timeout (minutes) | Inactivity period before the screensaver activates. |
| Home Screensaver | When on, every return to page 0 — on boot, after tapping the home button, when a locked page auto-returns — activates the screensaver immediately, even if the inactivity timeout hasn't fired. A tap on the screensaver brings up the PIN keypad instead of dismissing it. Cancelling the keypad re-activates the screensaver, so page-0 widgets are never reachable without an explicit PIN. |
| Anti-burn-in cycle | A daily full-screen white/black flash to prevent image retention on the display. |
| Anti-burn-in hour | The hour to run the cycle (0–23, e.g. 3 = 3 AM). Uses an internet time server for exact timing; otherwise runs 24 h after boot. |
Tab Update
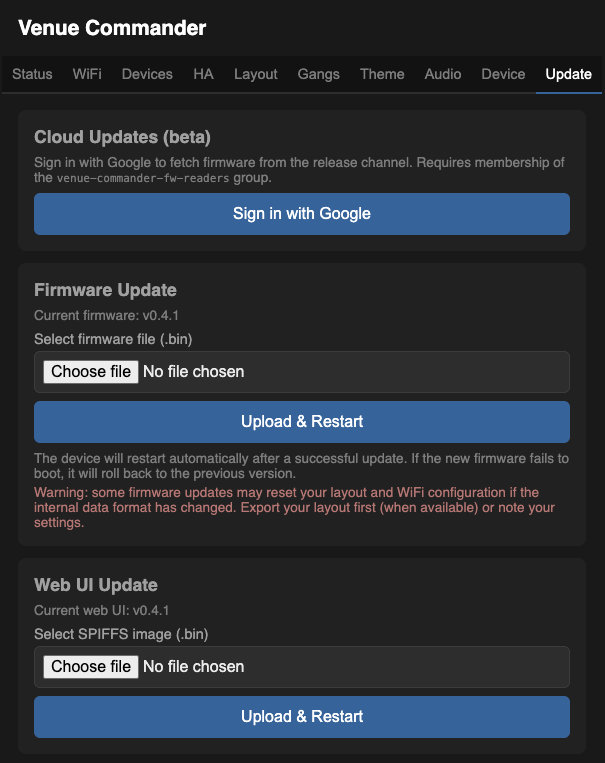
Cloud Updates (beta)
Updates can be fetched directly from the official release channel — no need to download anything yourself. Sign in with Google, pick a release, and install everything that applies to your board with one click.
- In the Cloud Updates card at the top of the Update tab, click Sign in with Google.
- Complete the sign-in in the pop-up window. (Your Google account needs to be on the access list for the release channel.)
- Click Check for updates, pick a version from the dropdown, then click Install all to install everything that applies to your board, or Install on individual components.
Manual Firmware Update
- Click Choose file and select a firmware
.binfile. - Click Upload & Restart.
- The device uploads the firmware to a spare slot and reboots into it.
- If the new firmware fails to start, the device automatically rolls back to the previous version.
Web UI Update
The web interface can be updated independently of the main firmware.
- Click Choose file and select the web UI
.binfile. - Click Upload & Restart.
Audio Board Firmware Update
When the optional audio board is connected, an additional Audio Board Firmware section appears. The touchscreen relays the new firmware to the audio board over their connecting cable.
- Click Choose file and select the audio-board firmware
.bin. - Click Upload.
- The web UI shows progress as the firmware is sent across to the audio board.
- The audio board verifies the file and reboots into the new firmware. The audio link drops briefly, then reconnects.